So for the film 'Are you Sleeping' I ended up applying the scar prosthetic for three days of shooting. They shot over 4 days but the character "Simon" wasn't needed for the first day of filming. It was a one piece prosthetic you saw from the sculpt. It was attached with pros aid and sealed with pros aid as well. I colored the scar using my Illustrator palettes(Skin, FX). Beside the scar I was constantly touching up the sweat effects on Jono(Simon). I had a few problems with the make up over the 3 days, nothing major but things you will constantly run into being a make up artist. The first and most serious one was the sweat. Not the fake sweat I applied, but the real sweat that was slowly ruining the edges of the applied piece. I fixed it up as best I could, not messing with it too much, as I didn't want to further the lifting edges. The second thing that happened was that the coloring was not exactly the same through out the 3 days, though this was minor, cause you don't see the scar close up enough in the 10 minute short to even notice it. The third and final thing was, on the second day the placement of the piece was a little to low, though only noticeable on the ear lobe, and most likely only noticeable if you are looking for such mistakes!!! But all in all it was a great experience, and the most times I have applied the same make up to date!! Oh also on the second day of shooting I ended with me doing some quick gashes(5) across Simons face. This will ended up being the final scene in the film. I really disliked th gashes I was extremely rushed, so I used thick blood to make the cuts, with normal blood running down. I wish I would have taken a bit more time to make the cuts a bit thinner. Less is more!! The one cool thing that worked out was I was able to cut right into the gelatin scar prosthetic to create one of the cuts, though I think in the end it will be so quick it wil be unoticeable.
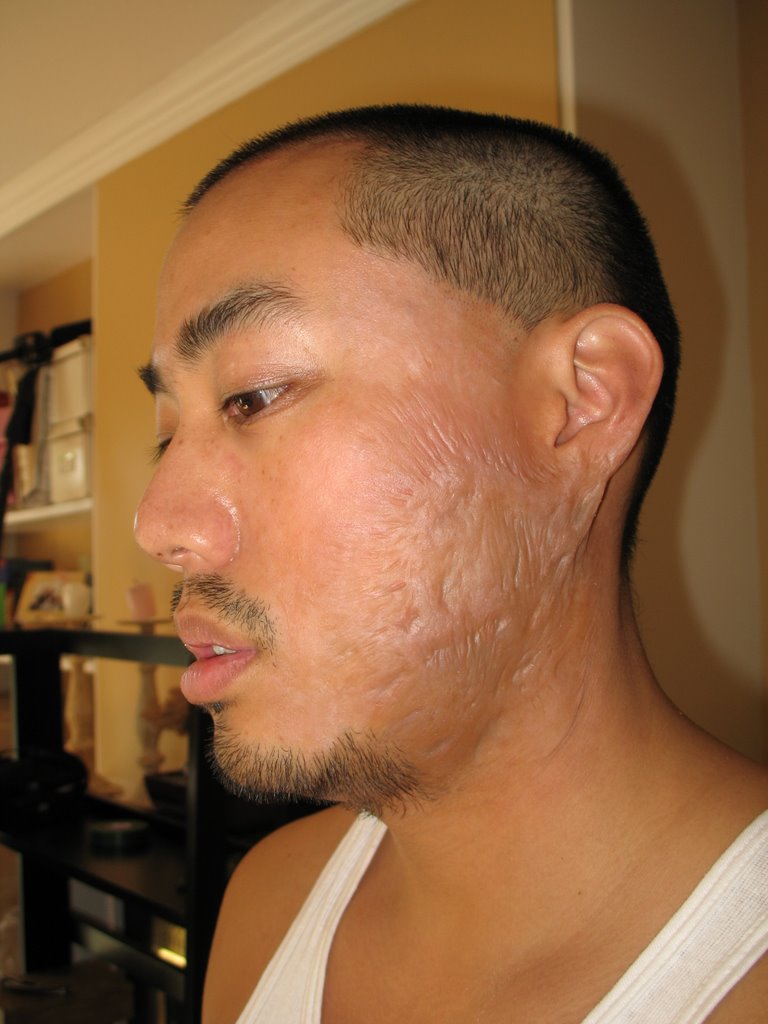
This was from day one, I liked the color job the most on this day, out of three. Namely the light tones and pinks tones that resemble the loss of skin pigment.
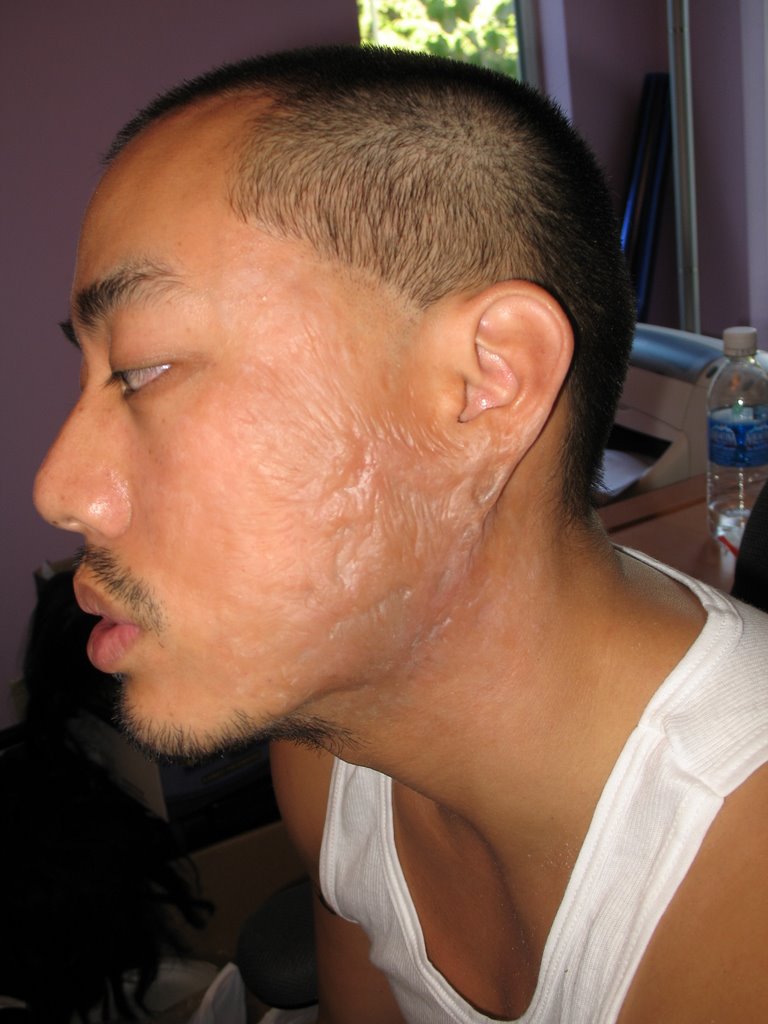
This was day two, like I said the placement was a little low, though hopefuly no one will notice!! Also it didn't have the same levels of pink and lighter color that I liked from the day before.
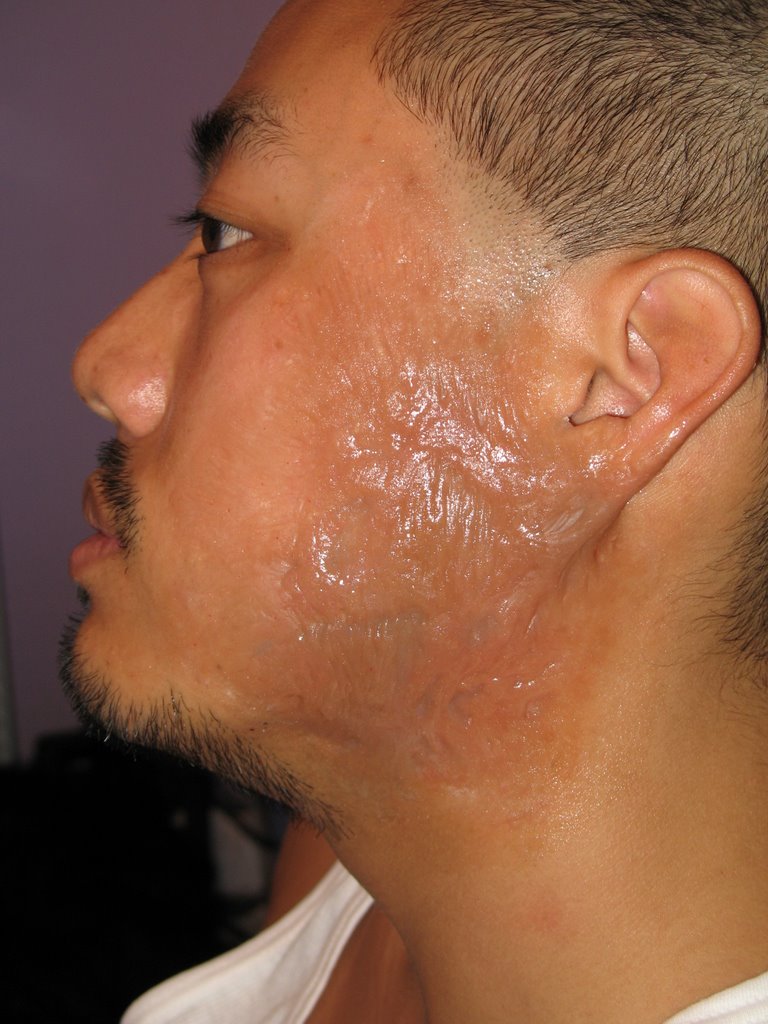
For the final day seen here, the piece was actually precolored before I even applied it. I actually precolored this piece as a color guide for the make up itself, then I ended up running one short(used for the practice application) so I used the precolored for the final days shoot. I don't recommend having just enough pieces, you should always have a back up just incase!! Once it was glued down I did a bit or color blending on the edges.
So even though this was from the second day of shooting, I put these up after the normal looks as it does happen last in the film. You can see the thick blood doesn't look so great but it did the trick, and the director was happy with it.
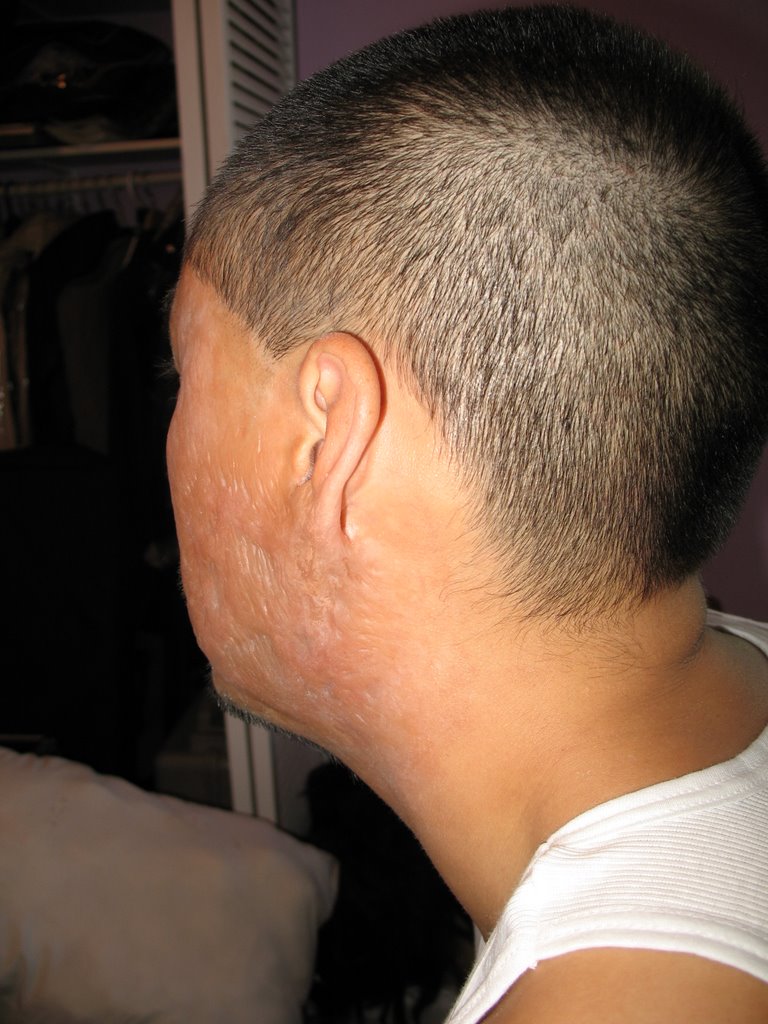
I added these last 2 pictures just for a different view. The first is an angle from behind the ear so you can see what it looks like back there. The second picture was from the make up from day 3 after I had sealed it with pros aid but not powdered it yet. The result was a very shiny look, I really liked it, and in the future might try to get a shinier look like this, some scaring does look like that.
UPDATE!!!: I attended the MAMM this past Sat the 9th of Sept, sadly our movie didn't place in the competition(we got greats reviews from viewers though!!), though we did lose to some great movies. Ours was much darker, the rest had a happy/comedy feel to it. It was a great experience none the less and I hope to collaborate again with the same guys. I for sure want to be apart of the competition again!