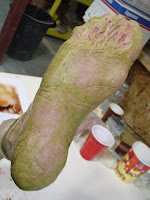
Tuesday, January 20, 2009

Who wants to rock out!? This kid does...

So just recently I got an offer to do a makeup turning a 13 year old boy into a 35 plus year old man. It was for an unusual circumstance but in the end I had to say yes!

Once it was agreed I'd do it, I quickly got the face cast done, and sculpted 2 cheek/nasal labial pieces, plus a forehead piece. I didn't want to have a huge pieces to glue down as the boy would be removing the make up him self with the help of his dad. SO I covered what I felt I need to, to get the proper end result.

The sculpts were done on a the face cast then floated off, and remounted on individual molds. I was happy with sculpts and the resulting appliances.


Since there was no chance for me to up keep the makeup once he left my place, I made sure to really seal and secure the make up applied. I used a barrier foam on the skin first then Top Guard from PPI. This gave me a nice surface for gluing too. I used pros aid for the glue down. Once it was blended off, I sealed it all again with pros aid, then 2 passes for Green Marble Selr, drying in between each pass. Then lightly powdered it after.

After this I did a quick couple passes of of Green Marble concentrate as a wrinkle stipple on the eyes. It was the first time I had used it for this purpose and was happy with the results. Definitely want to use this again in the near future to see what I can come up with.


I went onto doing a base of Illustrator with a sponge then used my air brush to do a serious of spatters in different red and brown shades. I also did some finer work with a regular brush. I did a vein tone pass in the deep eye sockets, plus some red finer veins on the upper lids. I did a heavier paint job than normal since the make up would be viewed in a darker setting. I was over all happy with it, but found it too yellow (yellow lights in the area I applied in), though everyone who has critiqued it says they don't feel it is...I still do!

I then laid a full beard and mustache. I gave the beard a quick cut, not too much time spent on styling it. I set it in place with a couple passes of hair spray, then finished it off with some hair whitener in his real hair and eye brows. Next time I will set the facial hair after I do the whitener, as it was hard to brush and blend it into the stiffer hand laid hair. The hair looked fine to the eye, but shows up much whiter in the pic due to the flash reflecting off of it.

In the end the father and son were very pleased, and the make up did what it was suppose to do!


Saturday, January 17, 2009

Sculpt update.

Here's some close ups of my silicone aging sculpt that I'm nearly finished.

I have another day or so on it, then I need to finish the hand sculpts and ear lobes. Then it's time to start breaking the sculpt down.


Thursday, January 08, 2009

Some HD trauma!!! **Update 09/17/09: makeup variation**
A few months ago make up artist/mentor/friend/co worker Stand Edmonds asked me if I would be interested in creating a make up for an HD lighting seminar he was co hosting. The make up would be lit on stage and shot and projected live with some of the latest HD cameras out there. I always enjoy doing new make ups and this was just the chance to do that once again!

He set me up with a model Caryl -Ann (VFS graduate) and I was able to get her face cast as well. I went to work sculpting what would be an assault victim make up. It consisted of 4 pieces. A right puffy split cheek, a puffy left eye/puffy cheek/split brow, a split nose and a split lip.
All the pieces (run in gelatin) had real thread stitches pre sewn in and secured with super glue (a method I highly recommend!)
I applied the make in around 2 hours or so, glued down with pros aid, colored with Illustrators and Stacolors and then sealed with Green Marble. I finished the make up with some 3 Kings My Blood (a nice aged brown shade).

All in all I liked this make up, the bruising got a bit washed out in the photos but to the eye it was much more intense, you can see this in the application pic below. The only thing I really regret is not having fake lashes in the puffy eye appliance! Oh well next time!!

Here is the finished make up with some mold and application pics as well!


Some bonus trivia: I also did a subtle silicone aging make up for the HD seminar as well, but at this time I have no pics of the finished make up. Also the reaction to the assault make up from the seminar crowd was just awesome, they gasped and awed, have to say it put a smile on my face. Finally I actually did this assault make up one more time for a demo shot at VFS for a TV spot on the school. To watch that spot follow this link!: http://www.vfs.com/blog/2008/10/17/makeup-design-program-stars-on-tv/


UPDATE 09/17/09: Variation 2

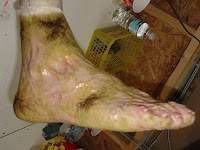
Some silicone work, from a bit ago.

So last spring while on a break from WCT Productions I did a quick job at SFX Studio Inc. I came in and first had to finish off a sculpt originally started by one of the most amazing sculptors in Vancouver and the world, Jamie Salmon. The first sculpt was about 85% done, I really just completed the sole of the foot.

Then I had the task of sculpting the entire other foot, which had an even further lizard mutations than the first. It's hard tyring to match the sculpting style of another artist, not to mention one with such incredible talent, I feel I did an OK job.

In the end we ran both feet in foam latex, which I painted with pax and Illustrator inks and acrylics. Then we ran a single silicone copy of Jamie's foot, which I seamed and painted with thinned down caulking and oil paints. These are some shots of that finished silicone foot.