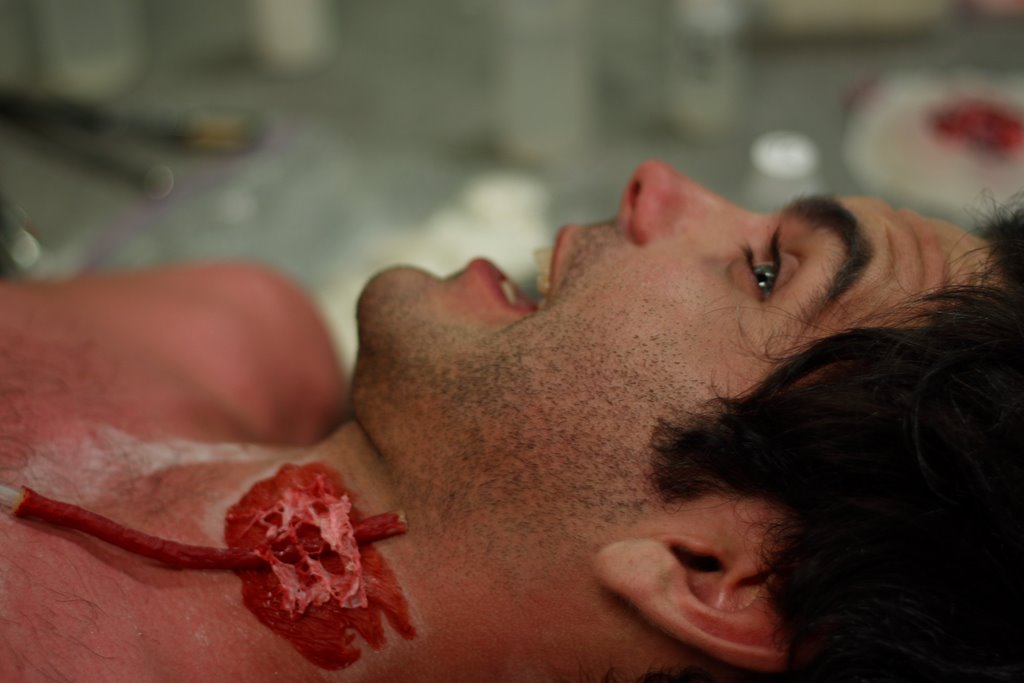
I ended up having 3 blood lines. 2 carried blood to the hole to pour out of it, while the 3rd line was connected to a vein I crafted out of latex(built up layers on a skinny round chop stick, then powdered and removed and then colored with the proper shade of pax paint), which had a hole in it, that would squirt an actual stream of pumping blood. So below you'll see several pictures going through the stages of applying this effect.
I glued down with pros aid the removed muscle textured pieces that were originally in the hole on the neck bite piece its self. Then put the vein I created over top, this was glued to the piece as well as the actors skin with Telesis 5. Then lastly I put a nice little piece of webed latex for another layer of texture. When I was placing the vein I would put the prosthetic over top to position the hole and make sure it was not covered.
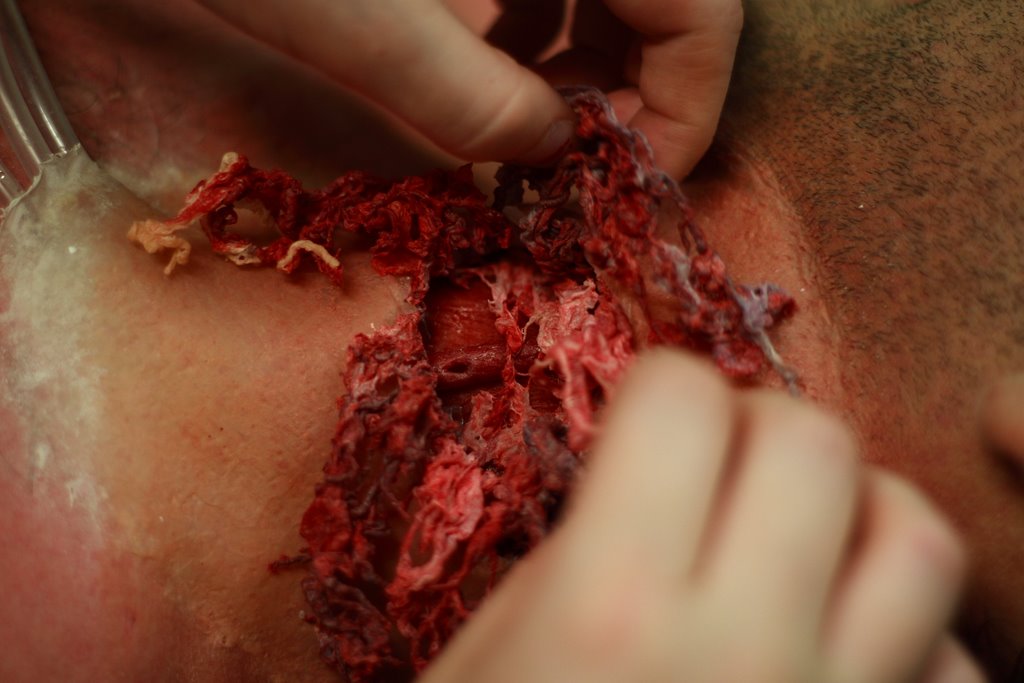
Next I glued the other 2 blood lines(connected to a 30cc and 60cc syringe) in place with Telesis 5 as well. After that I glued the neck bite piece in place with pros aid. I had sandwiched the latex in between the the 2 pieces earlier to create the final single piece to apply. I colored it with Illustraor colors to match his skin tone. Then even added some stubble effect with a dark brown and black so it would blend more on the neck. You can see all 3 blood lines coming out of the bottom of the effect.

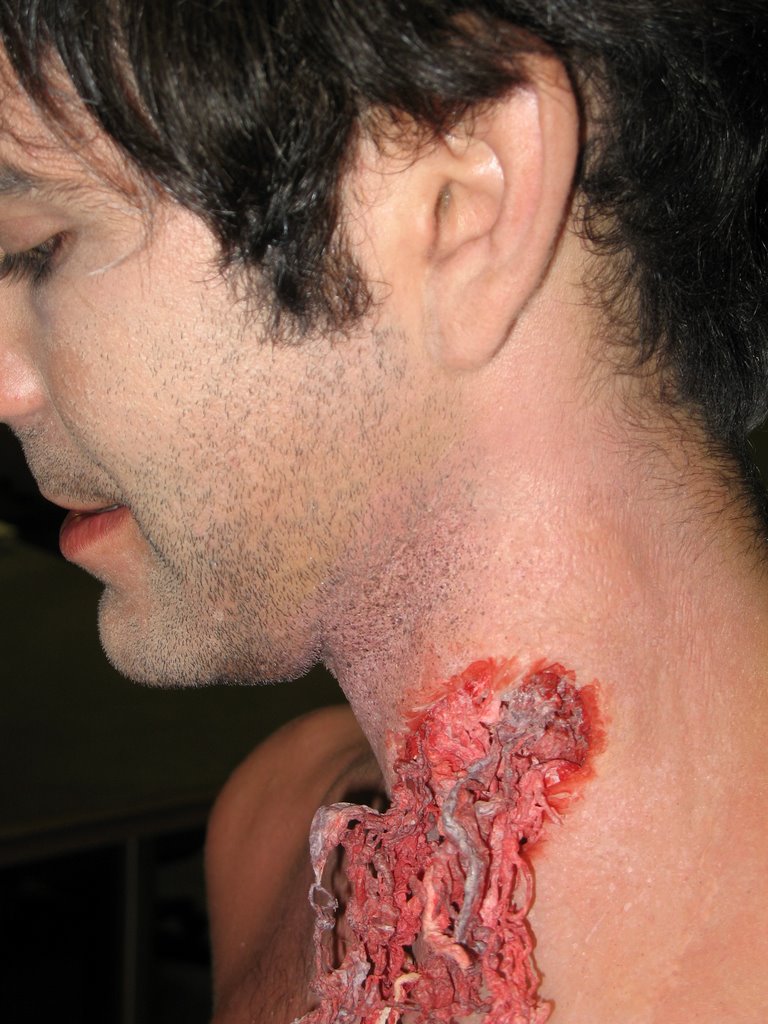
After the coloring was done we got him in to wardrobe and to the set. As you can see it blended nicely and everything that makes it work was perfectly hidden. What was to come was so thrilling, after the take, people literally stood there swearing and in awe of what just took place.


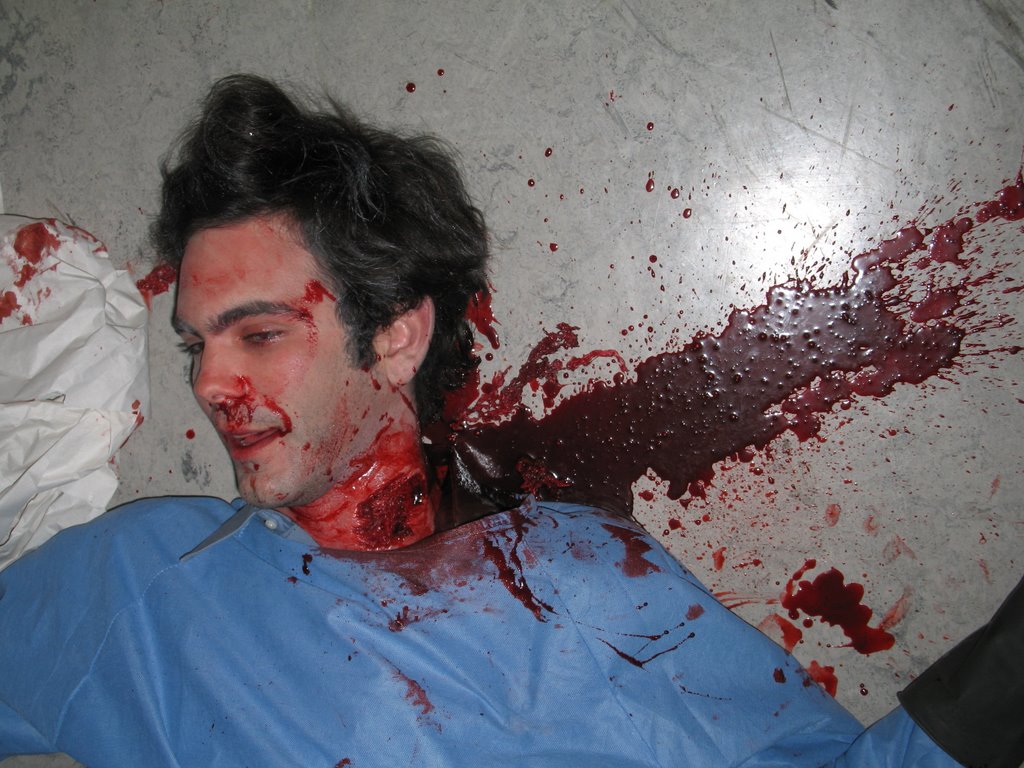
This is the aftermath. The large area of blood was the from the vein and it looked awesome as it squirted(pumped with 60cc syringe) out of the jugular. The latex strands were bit and torn off by the zombie. I was extremely pleased with how it tured out, and so was the director, so it was just the best feeling.

3 comments:
.......wow......nasty.
follow your dream. You will be a very successful makeup artist, your work is amazing! From one makeup artist to another!
I am trying very hard to!! It honestly takes so much work and energy..but it's what I want most. Thank you, I really appreciate your support!
Post a Comment